DIY Jewelry and Accessory Holders That Actually Look Good
Contents
DIY jewelry and accessory holders solve that infuriating problem we all face—untangled necklaces buried in drawers, missing earring backs, and that favorite bracelet you swear you had last week.
I’ve wasted more mornings than I’d like to admit frantically digging through jewelry boxes, and I finally had enough.
These projects transformed my chaotic collection into something I can actually see, reach, and yes, even show off a little.

Why Your Jewelry Deserves Better Than a Tangled Drawer
Let me be straight with you.
That fancy jewelry box collecting dust isn’t helping anyone.
Your necklaces are having secret meetings in there, forming friendship bracelets you never asked for.
Your earrings are playing hide-and-seek with their backs.
And don’t even get me started on trying to find anything when you’re already running late.
Here’s what happens when you organize properly:
- You actually wear the jewelry you own (shocking concept)
- Getting ready takes minutes instead of a treasure hunt
- Your pieces last longer without tangling damage
- Your space looks intentional instead of chaotic
I’m not talking about spending a fortune on fancy retail solutions that cost more than your actual jewelry.
We’re making these ourselves with materials you can grab at Dollar Tree or repurpose from stuff already lying around your house.

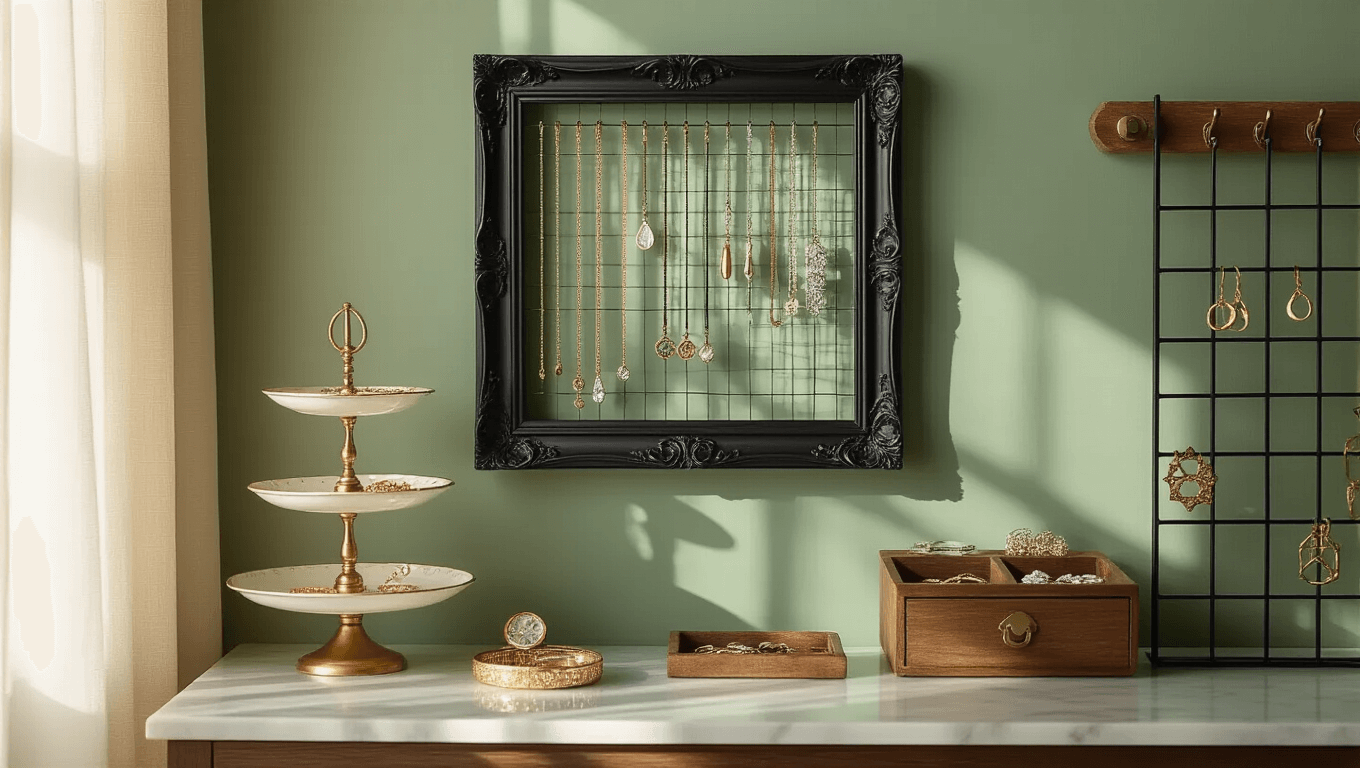
The Picture Frame Revolution
This project changed everything for me.
What you need:
- An ornate picture frame (thrift stores are gold mines for these)
- Chicken wire or decorative metal mesh
- Wire cutters
- Staple gun or heavy-duty adhesive
- Spray paint (optional, if you want to refresh the frame)
Remove the glass and backing from your frame.
Cut your chicken wire or mesh to fit the frame opening, leaving about an inch extra on all sides.
Secure it to the back of the frame using your staple gun or adhesive.
Hang it on your wall.
Done.
The wire backing lets you hook earrings through it directly, and you can hang necklaces from small hooks attached to the frame or mesh.
I painted mine matte black to match my bedroom, but a distressed gold would look incredible in a glam space.
Pro move: Use frames of different sizes in a gallery wall arrangement for a legitimate art installation that happens to hold your jewelry.

The Dollar Tree Hack That Actually Works
I’ll admit I was skeptical about Dollar Store solutions.
Then I tried this and immediately made three more.
Grab these from Dollar Tree:
- 2-3 paper towel holders (the standing kind)
- Zip ties
- Small metal baskets or wire organizers
- Picture hanging hooks
Stack the paper towel holders using zip ties to connect them securely at the base.
The vertical rods become perfect necklace hangers.
Slide bracelets onto the rods.
Attach small baskets at the base with more zip ties for rings and earrings.
Total cost? Under $5.
Total time? Maybe 15 minutes.
I put one of these together while watching TV, and now it sits on my dresser looking way more expensive than it actually is.

The Jewelry Board Game-Changer
This one’s for people who want everything in one spot.
Think of it as command central for your entire collection.
You’ll need:
- A large corkboard or wooden board (12×18 inches minimum)
- Fabric to cover it (optional but recommended)
- Various hooks in different sizes
- Small decorative knobs
- Paint or stain (if using bare wood)
- Mounting hardware
If you’re covering with fabric, wrap it around your board like you’re wrapping a present and secure it on the back with a staple gun or hot glue.
Plan your layout before attaching anything permanently.
I sketched mine out on paper first because I’m not great at eyeballing measurements.
Strategic placement matters:
- Top section: Long hooks for necklaces (space them 2-3 inches apart so chains don’t touch)
- Middle section: Smaller hooks or decorative knobs for bracelets
- Bottom section: Push pins or small hooks for earrings
- Side areas: Tiny shelves or small containers for rings
Install your hooks and knobs in your planned layout.
Mount the board to your wall using appropriate hardware for your wall type.
Start organizing.
The beauty of this system is how customizable it is.
My friend made one using an old barn wood plank and copper pipe hooks for a rustic vibe that looks straight out of a magazine.
I went with painted white wood and brass hooks for a cleaner look.
Both work beautifully.

The Three-Tiered Thrift Store Special
This tabletop solution uses plates and candlesticks you can find at any thrift store.
Hunt for:
- One large plate (dinner plate size)
- One medium bowl or smaller plate
<