Decorative Storage Bins for Props: The Ultimate Guide to Storage That Actually Looks Good
Contents
Decorative storage bins for props have completely changed how I approach organizing my creative spaces, and I’m going to show you exactly how to use them without turning your room into a Pinterest fail.
You know that feeling when you’ve got props, supplies, and random stuff everywhere, but you still want your space to look good on camera? Yeah, I’ve been there too many times. The solution isn’t cramming everything into ugly plastic tubs and hoping nobody notices.

Quick Style Snapshot: What You’re Getting Into
Let me be straight with you about what this project actually involves.
Time commitment: 2-4 hours (depending on how many bins you’re wrangling and whether you get distracted rearranging everything three times like I do)
Budget range: $20-200+ (you can absolutely start small with budget-friendly storage baskets and upgrade later)
Space requirements: Works in literally any room size—I’ve done this in closets and entire living rooms
Skill level: Beginner to intermediate (if you can arrange books on a shelf, you can do this)
Seasonal flexibility: Year-round with easy seasonal tweaks
The best part? Once you set this up, it stays looking good with minimal effort.
Why Decorative Storage Bins Actually Matter
I used to think storage was just storage. Grab whatever’s cheap at the dollar store and call it done.
Then I started creating content and realized something crucial: everything in your frame either adds to your aesthetic or destroys it.
There’s no neutral ground.
Those bright blue plastic bins from college? They’re killing your vibe in every single shot. But handwoven storage baskets with natural textures? They’re doing half your styling work for you.

The Design Identity You’re Creating
Here’s what makes this approach different from just “getting organized”:
Purpose: You’re building functional storage that doubles as decor
Target spaces: Living rooms, bedrooms, home offices, entryways, bathrooms—anywhere you create content or just want things to look intentional
Style range: Farmhouse to contemporary, boho to minimalist
The key is choosing pieces that hide clutter while adding texture, warmth, and visual interest to your space.
Must-Have Items: Building Your Collection
Don’t go buying 47 matching baskets. That’s not how this works.

Foundation Pieces
Start with variety in sizes and heights. I learned this the hard way after buying six identical medium baskets and realizing they looked boring and repetitive on camera.
Your foundation should include:
- Large floor baskets (16-20 inches) for blankets, props, or bulky items
- Medium baskets (10-14 inches) for shelves and surfaces
- Small containers (6-8 inches) for desktop organization and small props
Material matters more than you think.
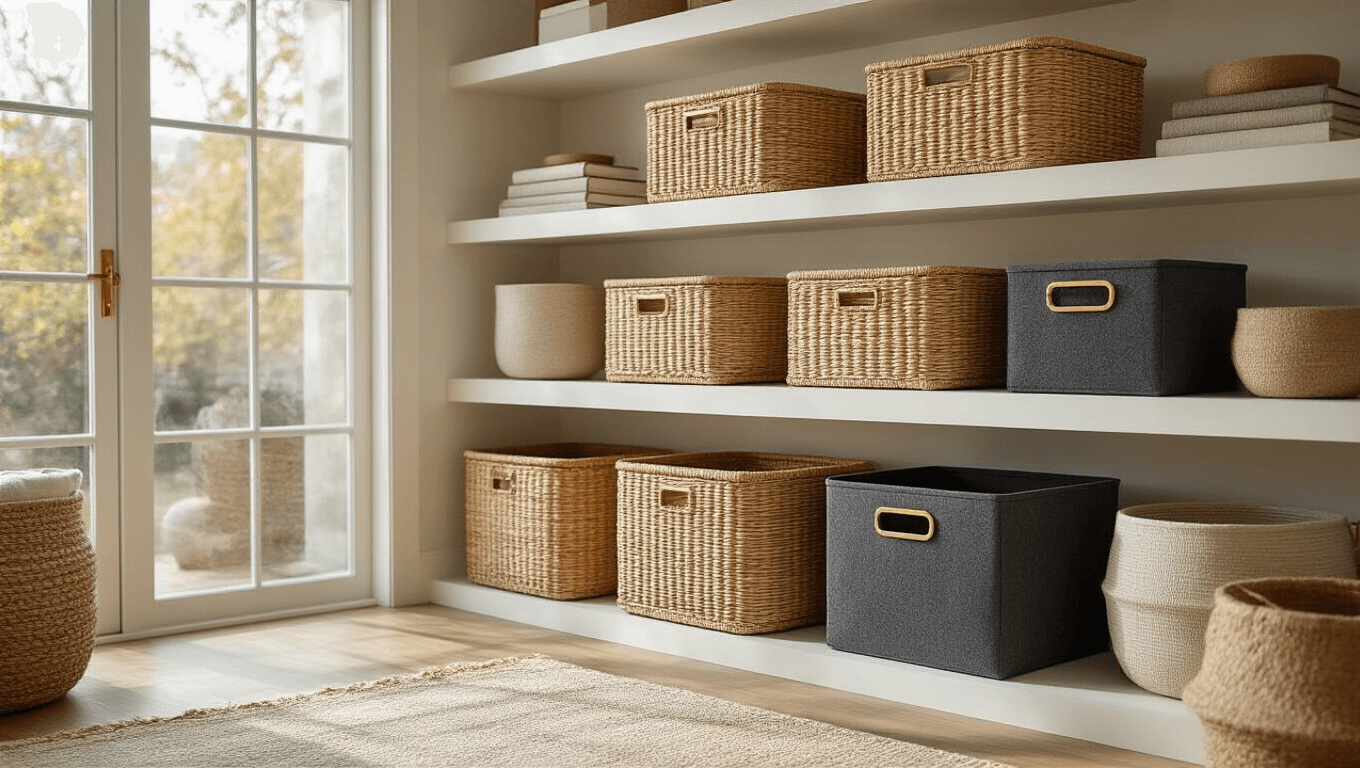
Natural woven rattan baskets photograph beautifully because they catch light differently than flat surfaces. Water hyacinth adds darker tones and tighter weaves. Abaca brings that perfectly imperfect handmade quality.
Color Strategy That Actually Works
Pick 2-3 neutral base colors and stick with them religiously.
My go-to combination:
- Natural tan/beige
- Cream or white
- Black or charcoal gray
This creates cohesion without being matchy-matchy. You want your bins to feel like a curated collection, not a bulk purchase from a catalog.

Optional Enhancements (That Aren’t Actually Optional)
Lidded baskets are game-changers for stuff you absolutely don’t want visible. I keep all my camera chargers, random cables, and “I’ll deal with this later” items in lidded storage baskets tucked on lower shelves.
Out of sight, still organized, zero visual clutter.
Stackable designs maximize vertical space without looking cramped. Just don’t stack more than two high or it starts feeling unstable and visually heavy.
Canvas or felt baskets add modern contrast when everything else is woven natural fiber. I use gray felt storage bins in my office alongside rattan baskets in my living room—same organizational system, different aesthetics.
Metallic accents (brass handles, copper frames, black metal edges) give you that expensive look without the expensive price tag.
Pro Styling Tips I Wish Someone Told Me Earlier
Layer different textures for depth. Pair tight-weave woven baskets with chunky rope containers. Mix smooth canvas with rough jute.
Use handles as visual anchors. Seriously, this sounds minor but handles create lines that draw the eye and make compositions feel intentional rather than random.
Position by size:
- Large baskets: floors and lower shelves
- Medium baskets: mid-level shelves and surfaces
- Small containers: upper shelves and desktop areas
This creates natural visual flow from bottom to top.
Leave breathing room. The amateur move is cramming baskets into every available space. Negative space around your storage makes each piece stand out and prevents visual overwhelm.

Setup & Execution: Making This Actually Happen
Time to stop planning and start placing.
Scene Prep Checklist
Before you buy a single basket, do this:
- Clear everything out of the area you’re styling
- Clean surfaces thoroughly (dust shows up in photos