Why Your Props Deserve Better Than a Closet
Contents
Look, you didn’t spend hours foam-smithing that armor or meticulously painting that replica sword to hide it away like dirty laundry.
Your props represent creativity, skill, and probably more late nights fueled by energy drinks than you’d care to admit.
A proper wall display does three things:
- Protects your investment from damage, dust, and accidental stepping-on incidents
- Creates breathing space in your cramped apartment or bedroom
- Makes your collection actually visible instead of forgotten in storage bins
Plus, let’s be honest—it looks absolutely badass.

The Real Questions You’re Probably Asking
“Won’t this destroy my walls?”
Not if you do it right, and I’ll show you damage-free methods that work even in rentals.
“What if my prop is too heavy?”
Weight distribution is key, and there are solutions for everything from lightweight foam pieces to hefty resin replicas.
“I’m not handy with tools—is this even possible for me?”
Absolutely, and some of the best methods require zero drilling or permanent installation.
My Favorite Display Methods (Tested and Approved)
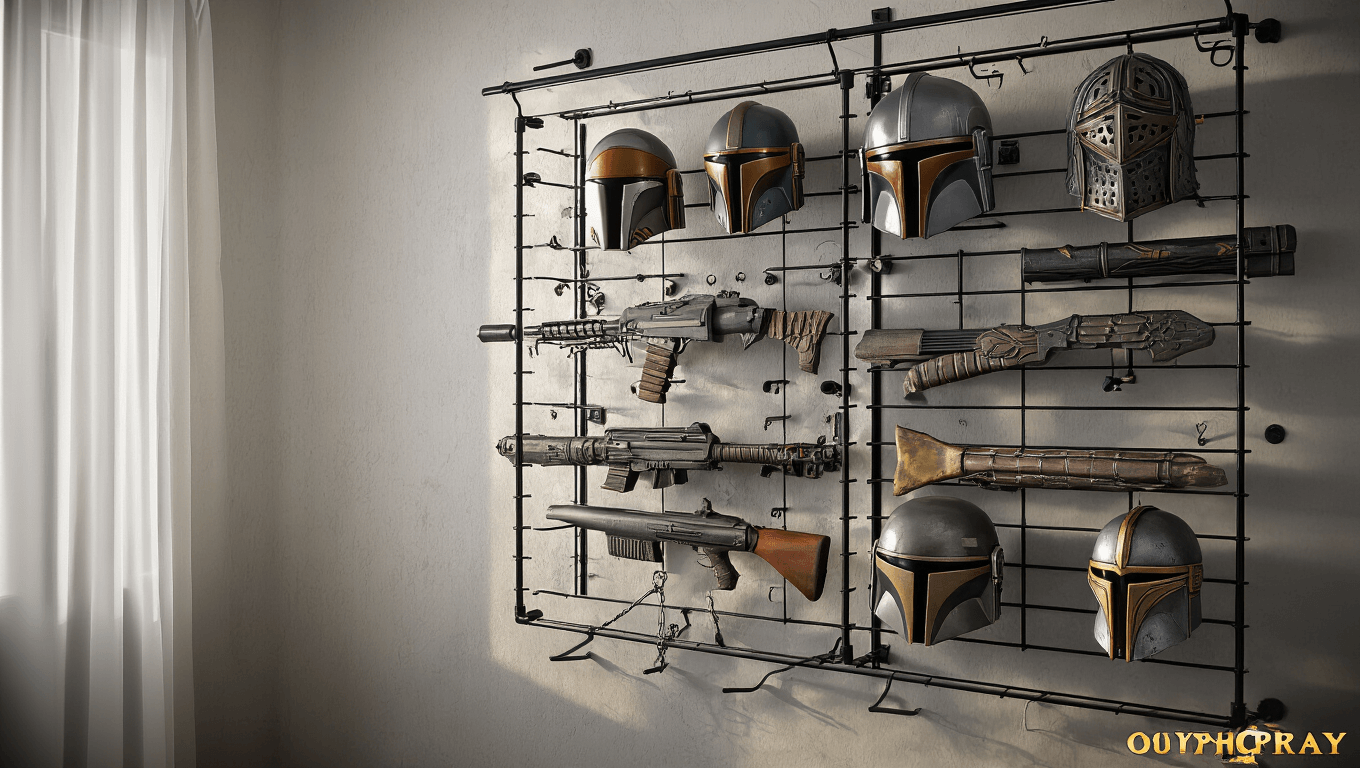
The Wire Rack System: My Go-To Solution
This is what I use in my own game room, and it’s saved my sanity.
Here’s why wire racks work brilliantly:
Wire retail display racks give you a modular frame that doesn’t require drilling into walls at all.
You secure them from above using drop ceiling hooks (if you have drop ceilings) or attach them to wall studs once and forget about them.
The horizontal bars accept specialized rack hooks that you can slide anywhere along the frame.
This means infinite adjustability.
Want to move that helmet three inches to the left?
Done in ten seconds.
What you’ll need:
- Wire display racks sized to your wall space
- Foam spacers to protect your walls from scratches
- Rack hooks in various sizes for different prop weights
- Basic installation hardware (comes with most rack systems)
Installation takes about two hours, even if you’re working alone.
The foam spacers sit between the rack and your wall, preventing that annoying rattling sound and protecting your paint job.

The Command Strip Method: For Renters and Commitment-Phobes
I used this system exclusively for three years in rental apartments where my landlord would’ve murdered me for putting holes in walls.
Command strips have come a long way, people.
The weight ratings are legit if you follow the instructions properly.
Best for:
- Helmets (my Master Chief helmet has been up for two years without budging)
- Lightweight foam weapons under 5 pounds
- Smaller costume pieces and accessories
- Temporary displays you plan to change frequently
The trick nobody tells you:
Clean your wall with rubbing alcohol and let it dry completely before applying the strips.
This isn’t optional—it’s the difference between secure mounting and waking up to your prop on the floor.
Use heavy-duty Command strips rated for at least twice your prop’s actual weight.
Create custom brackets from lightweight materials (foam board, plastic, even sturdy cardboard) and attach the Command strips to those brackets rather than directly to your props.
This protects your prop’s finish and distributes weight more evenly.

The PVC Hanger System: Budget-Friendly and Customizable
This is my favorite DIY solution for oddly-shaped props that don’t play nice with standard hangers.
Why PVC works:
You can configure it to literally any shape you need.
Need a curved support for a round shield?
Heat the PVC gently with a heat gun and bend it.
Want an angled display for a sword?
Cut and connect the fittings at whatever angle works.
Building your own:
Grab some PVC tubing from any hardware store in whatever diameter matches your props.
Single-leg pegboard hangers slide right into standard pegboard, giving you that retail display look.
Here’s what I do for a professional finish:
- Clean the PVC with rubbing alcohol
- Spray with Krylon Fusion plastic paint in your chosen color (black looks sharp, metallic colors work for sci-fi props)
- Wrap sections with electrical tape for grip and visual interest
- Let everything cure for 24 hours before hanging props
The whole setup for a 6-foot section costs under $30 and takes maybe an afternoon to build.

How to Actually Arrange Your Props (Without Looking Like a Hoarder)
Create Visual Hierarchy
Your hero prop goes at eye level.
This is your statement piece—your most impressive, detailed, or personally significant prop.
Everything else supports it.
I keep my most elaborate helmet front and center at about 5 feet high.
Larger weapons flank it on either side, creating a triangle composition that naturally draws the eye.
Smaller accessories fill gaps but never compete for attention.
Balance Is Everything
Don’t cluster everything on one side like you’re staging a prop avalanche.
Distribute weight and visual interest evenly.
If you have three heavy pieces, space them across your display rather than grouping them together.
This prevents your wall from feeling lopsided and keeps viewers’ eyes moving across the entire display.
