How to Display Large Props Like a Pro (Without Destroying Your Space)
Contents
Large props deserve better than being shoved in a corner collecting dust.
I learned this the hard way when I spent three months crafting a six-foot dragon head only to watch it topple over at my first convention display.
The crash echoed through the entire hall.
My face turned redder than the dragon’s painted scales.
But that disaster taught me everything about displaying oversized props correctly, and I’m going to share those hard-won lessons with you right now.
")
Why Size Matters (And Why It Complicates Everything)
Large props command attention in ways smaller decorations simply can’t.
They create focal points that pull people across rooms.
They make jaws drop and cameras come out.
But they also present challenges that’ll test your patience, your wall studs, and occasionally your marriage when your partner asks why there’s a life-sized Iron Throne in the living room.
The biggest mistake people make?
Treating large props like regular decorations.
They’re not.
They require engineering, not just enthusiasm.
Strategic Placement: Where to Put Your Monster Props
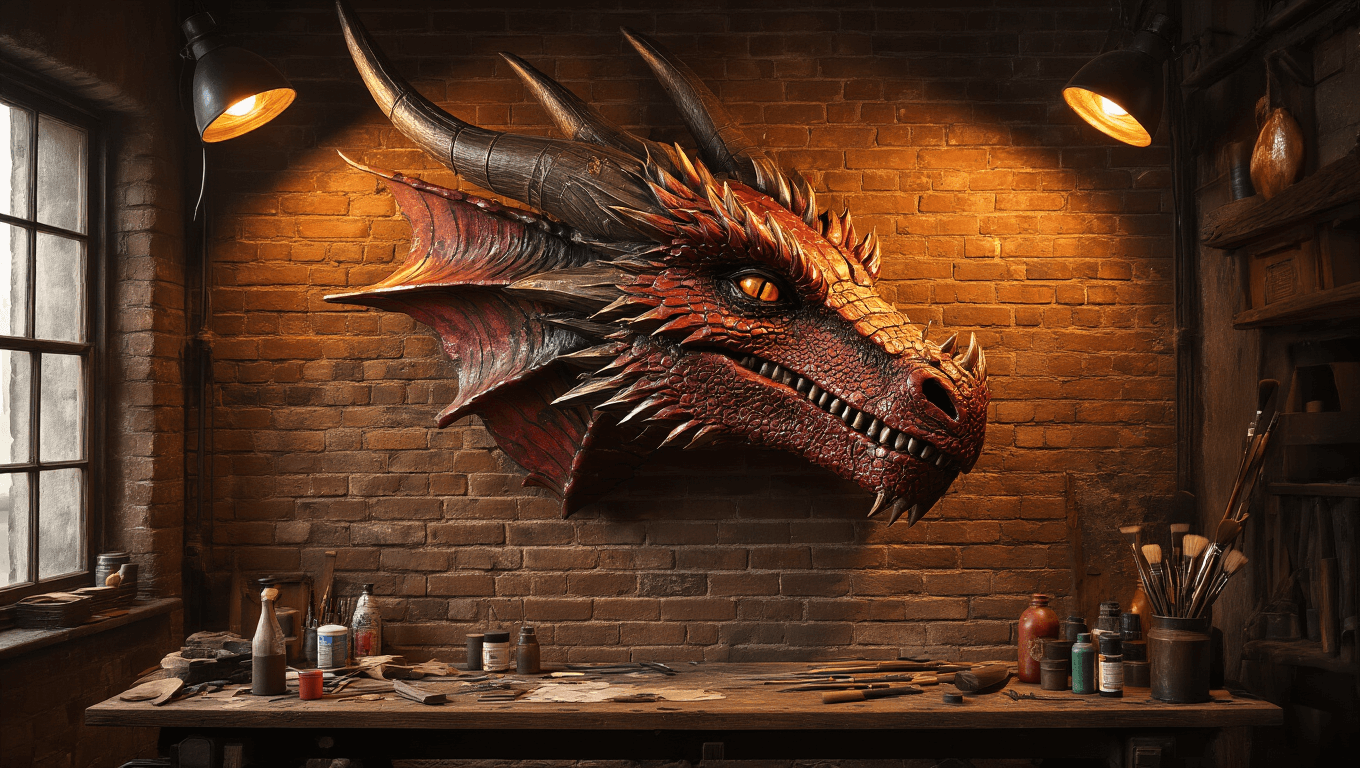
The Wall-Hug Method
Position large props against walls whenever possible.
This isn’t just about saving space—though that’s certainly a bonus.
Wall placement hides your structural supports, mounting hardware, and those ugly reinforcement rods you definitely needed but wish were invisible.
I mount about 80% of my large props this way, and it creates that clean, professional look you see in museums.
Plus, you can actually walk through your room without doing an obstacle course every time you need to grab your phone charger.
")
The Center Stage Approach
Some props demand center placement.
Interactive pieces that people photograph with need clear access from all angles.
When I displayed my full-size medieval knight armor, I positioned it dead center in my display room.
People could circle it completely.
Take photos from every angle.
Even test how the joints moved (carefully, under supervision).
Center placement works when:
- The prop looks finished from all sides
- You want maximum engagement
- You have the floor space to sacrifice
- The piece serves as a conversation starter
Don’t center-display anything with visible hot glue drips on the back—learned that one the embarrassing way.
")
Making It Look Spectacular: The Detail Obsession
Size alone won’t impress anyone beyond the first three seconds.
What keeps people staring?
The details.
I once spent forty hours on a prop sword, with thirty-five of those hours dedicated purely to weathering, painting, and adding realistic wear patterns.
Was it excessive?
Probably.
Did people notice?
Absolutely.
Texture Is Your Secret Weapon
Smooth, uniform surfaces scream “foam and paint.”
Real objects have:
- Scratches and dents from imagined use
- Varying surface textures that catch light differently
- Dirt buildup in recesses and corners
- Wear patterns on high-contact areas
I use metallic paint sets combined with dry brushing techniques to create depth that photographs beautifully.
Add Working Elements When Possible
Light-up features transform static displays into showstoppers.
My arc reactor prop cost $40 to build, but adding LED light strips for another $15 tripled the attention it received.
Moving parts work even better when safely executed.
Joints that articulate, doors that open, buttons that click—these interactive elements create memorable experiences people actually want to share on social media.
")
Engineering for Stability (Or: How to Avoid My Dragon Head Disaster)
Props taller than five feet need serious structural support.
Not “eh, probably fine” support.
Actual engineering.
The Base Weight Solution
Add weight to the bottom of freestanding props.
I use:
- Sand-filled PVC pipes hidden inside hollow props
- Steel plates bolted to bases and covered with decorative elements
- Concrete-filled compartments for outdoor displays
- Weighted sandbags for temporary setups
A good rule: your prop’s base should weigh at least 40% of the total weight for pieces over six feet tall.
Wall Mounting That Actually Works
When I mount props to walls, I follow this system religiously:
Step 1: Find your wall studs with a reliable stud finder—no guessing, no “it’s probably here.”
Step 2: Measure the depth your prop needs to sit flush or at your desired angle.
Step 3: Cut mounting pegs or use heavy-duty wall anchors rated for triple your prop’s weight.
Step 4: Install upper supports first, then lower supports to prevent sagging.
Step 5: Test with gradual weight before full installation.
I once skipped the stud finder step because I was “pretty sure” I knew where the stud was.
My prop made it exactly 36 hours before pulling a chunk of drywall off with it.
Don’t be like me.
Anchor Points for Safety
Props in public spaces or homes with kids need anchoring.
Use anchoring bolts or cables for anything that:
- Stands over five feet tall
- Could tip if bumped
- Has an uneven weight distribution
- Will be around children or pets
I lost a weekend repairing a prop that a friend’s toddler tried