Cosplay Makeup Tips That Actually Work (And Won’t Melt Off Your Face)
Contents
I’m gonna be real with you right now—cosplay makeup is one of those things that looks easy until you try it yourself.
You watch tutorials where people transform into perfect anime characters or flawless video game heroes, and you think “yeah, I can do that.”
Then you end up looking like you got into a fight with your makeup bag and lost.
I’ve been there. Trust me.
But here’s the thing—cosplay makeup tips aren’t really about having expensive products or being some kind of artist.
It’s about knowing a few key tricks that make all the difference between looking like your character and looking like… well, a mess.
After tons of conventions, way too many failed attempts, and finally figuring out what actually works, I’m breaking down everything you need to know.
No fancy terms. No impossible techniques.
Just real advice that’ll help you look amazing in photos and survive a full day at a con without your face sliding off.
")
Why Regular Makeup Just Doesn’t Cut It
Here’s what nobody tells you when you’re starting out.
Your everyday makeup routine? Yeah, that’s not gonna work for cosplay.
I learned this the hard way at my first convention when my “flawless” makeup looked completely washed out in every single photo.
Regular makeup is designed for normal lighting and maybe a few hours of wear.
Cosplay makeup needs to:
- Show up clearly in photos (even with harsh convention center lighting)
- Last for 8+ hours without touch-ups
- Handle sweat, wigs, and costumes rubbing against your face
- Often create features that aren’t naturally yours
It’s basically stage makeup meets everyday beauty, with some cartoon logic thrown in.
And that means you gotta approach it differently from the start.
")
Prepping Your Face (Because This Actually Matters)
Okay so before you touch any color products, you gotta prep your skin properly.
I know, I know—everyone wants to skip this part and get to the fun stuff.
But skipping prep is literally why your makeup looks cakey or disappears by noon.
Start with clean skin.
Wash your face with whatever cleanser you normally use.
Pat it dry—don’t rub, because that irritates your skin and makes foundation harder to apply.
Moisturize like your life depends on it.
Even if you have oily skin. Especially if you have oily skin, actually.
Dry skin will make your makeup look flaky and weird, and oily skin without moisture will just produce more oil to compensate.
Give your moisturizer like 5-10 minutes to really sink in before moving on.
Primer is non-negotiable.
This is the stuff that makes everything else stick to your face and last all day.
Get a good face primer that works for your skin type.
I use a pore-filling one because my skin texture isn’t great, but there’s primers for everything—color-correcting, mattifying, hydrating, you name it.
Apply it all over your face, paying extra attention to areas where makeup tends to break down first (around your nose, forehead, chin).
Let it set for a minute before foundation.
Your future self will thank you when your makeup still looks good at 6pm.
")
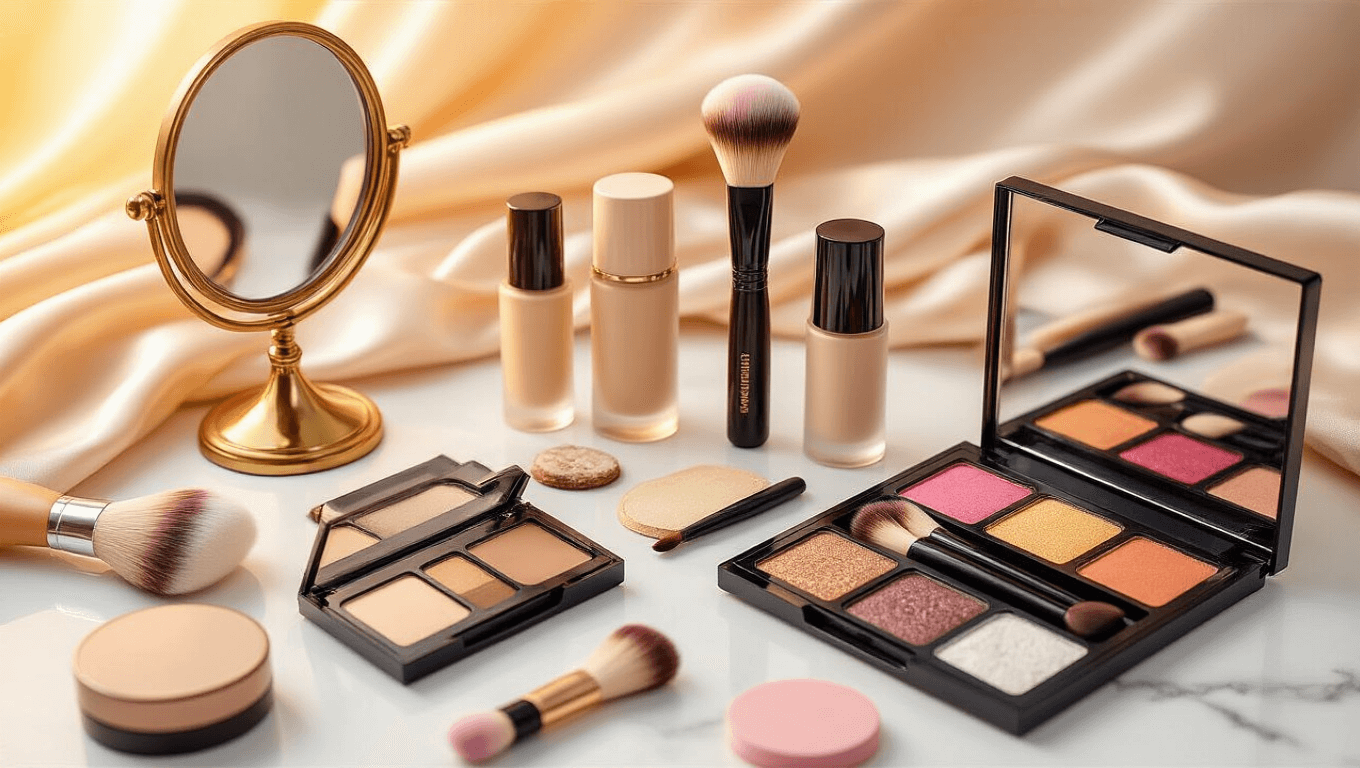
Foundation: The Base That Makes or Breaks Everything
Alright, foundation for cosplay is different than foundation for everyday life.
You need more coverage, better lasting power, and it needs to photograph well.
Liquid foundation is your best friend here.
Powder foundations just don’t give you the coverage you need, and they can look chalky in photos.
Cream foundations work too, but liquid blends easier and looks more natural.
Here’s how I apply it, and this technique changed everything for me:
Don’t just slap it all over your face at once.
Put dots of foundation all over—more product where you need more coverage (for me that’s around my nose and any blemishes), less around the edges.
Then blend outward from the center of your face.
I use a damp beauty sponge because it gives the most natural finish, but brushes work too if that’s your preference.
The key is blending, blending, and more blending.
You don’t want any visible lines where your foundation stops.
Color matching is crucial.
For most characters, you want foundation that matches your actual skin tone.
But sometimes you might need to go lighter or darker depending on the character—just make sure to blend it down your neck so you don’t have that weird mask effect.
Concealer comes after foundation, not before like some people think.
Use it only where you still need coverage after foundation—under eyes, on blemishes, any scars or dark spots.
Pat it on and blend the edges so it melts into your foundation.
One trick I learned: if you’re gonna cover your natural lips later (for painting on different shaped lips), use foundation on them, not concealer.
Concealer is super drying on lips and can look grayish.
Foundation matches your skin better and won’t make your lips feel like the desert.
")
Contouring and Highlighting (aka Face Sculpting Magic)
This is where cosplay makeup gets fun because you’re literally creating shadows and light that might not exist on your face.
A lot of people skip this step thinking it’s too complicated, but honestly it makes the biggest difference in photos.
Why contour and highlight matter for cosplay:
- Photos flatten your face—you need to add dimension back
- You can change your face shape to match your character
- It makes your features more visible from a distance
- Convention lighting is harsh and washes you out
Use powder products, not cream.
Cream contour and highlight look great for like an hour, then they move around and get muddy.
Powder stays put all day, especially over your liquid foundation.
For highlighting:
Get a light, slightly shimmery powder—nothing with chunky glitter, that looks weird in photos.
Apply it with a fluffy brush to:
- Down the center of your nose
- Top of your cheekbones
- Center of your forehead
- Your cupid’s bow
- Center of your chin
Use a patting motion instead of sweeping to really pack the color on.
For contouring: