How I Built My Dream Fantasy Canopy Bed Without Breaking the Bank
Contents
Creating a DIY canopy for your fantasy bedroom is easier than you think, and I’m going to show you exactly how to do it.
I spent years scrolling through Pinterest, daydreaming about those gorgeous canopy beds that looked like they belonged in a fairytale castle. But every time I looked at the price tags, I wanted to cry. So I decided to stop wishing and start building.
Why Your Bedroom Deserves This (And Why You’re Probably Overthinking It)
Look, I get it. You’re worried you’ll mess it up. You think you need professional carpentry skills. You’re convinced your ceiling will come crashing down.
I had all these same fears. But here’s the truth: if I can do this while drinking wine and listening to true crime podcasts, you absolutely can too.
The magic of a canopy bed isn’t just about aesthetics. It creates a room within a room, a sanctuary that makes you feel protected and special every single night. And that feeling is worth every minute of effort.
The Styles That’ll Make Your Heart Skip a Beat
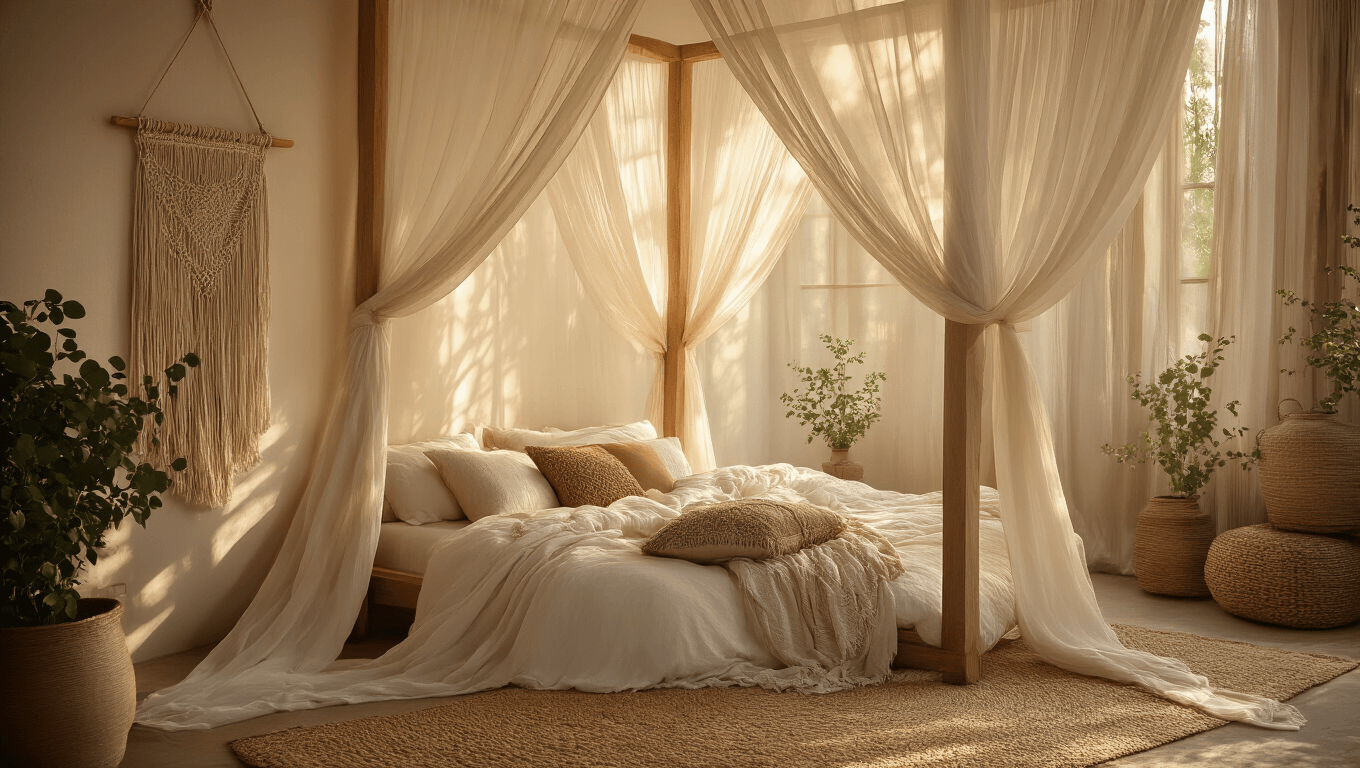
The Bohemian Dream Weaver
I started with a boho canopy because I loved the relaxed, “I woke up like this” vibe.
Think flowing fabrics, macrame details, and that perfect amount of organized chaos. The beauty here is that imperfection actually adds to the charm.
What makes it work:
- Natural wood elements
- Cream, ivory, or warm earth tones
- Textured fabrics that catch the light
- Layered textiles for depth

The Dark Academia Gothic
This one surprised me because I didn’t think I could pull off “moody” in my bedroom. Turns out, I was wrong.
The gothic approach uses deeper colors and more structured lines. It’s like Hogwarts meets modern design, and honestly, it’s stunning.
Key elements:
- Rich jewel tones or classic black
- Velvet or heavy fabrics
- Architectural details
- Vintage-inspired hardware

The Ethereal Princess
This is the style that started my obsession. Sheer, flowing fabrics that make you feel like you’re sleeping in a cloud.
It’s romantic without being cheesy, feminine without being over the top.
The winning formula:
- Ultra-light, sheer fabrics
- Soft whites, blush pinks, or light lavenders
- Minimal structure, maximum flow
- Delicate details

The Moroccan Fantasy
If you want to go bold, this is your move. I tried this in my guest room and visitors literally gasp when they see it.
Rich colors, intricate patterns, and that luxurious feel that makes every night feel special.

Let’s Build This Thing: My Favorite DIY Methods
The Dowel and Copper Frame (My Personal Favorite)
Cost: Around $35-40
This was my first successful build, and I’m still proud of it two years later.
What you’ll need:
- Four wooden dowels (1¼ inch diameter works perfectly)
- Four copper pipe elbows
- Heavy-duty eye hooks
- Ceiling anchors
- Your chosen fabric
Here’s how I did it:
First, I measured my bed. Added about 6 inches on each side so the canopy would hang nicely over the edges.
I cut the dowels to size (or had the hardware store do it because I’m lazy).
Connected the dowels with the copper elbows to create a square frame. The copper gives it this industrial-chic look that I wasn’t expecting to love but absolutely do.
Screwed eye hooks into each corner of the frame.
Located the ceiling joists using a stud finder. This step is non-negotiable unless you want your canopy on the floor at 3 AM.
Installed ceiling anchors and hooks, then hung the frame.
Draped sheer curtain panels over the frame.
Done. Seriously, that’s it.
Time investment: About 3 hours including multiple coffee breaks
The IKEA Track Hack (For the Minimalists)
Cost: $50-70
This method gives you the cleanest, most tailored look.
I used this in my master bedroom because I wanted something more sophisticated.
Shopping list:
- IKEA VIDGA or HUGAD ceiling track system
- Three curtain panels (one you’ll cut in half)
- A wooden dowel
- Cup hooks for the headboard area
The process:
Install the ceiling tracks in a horseshoe shape around your bed. I did a rectangle because I wanted coverage on all four sides.
Hang your curtain panels on the tracks. The cut panel goes in the back so you have fullness without buying extra fabric.
Mount cup hooks on either side of your headboard. Place the dowel through the curtain fabric to create those gorgeous swoops and drapes.
The genius of this method is that you can actually open and close your canopy. Some days I want to be cocooned, other days I want it open.
Time investment: 4-5 hours (mostly because IKEA instructions make me want to scream)

The Command Hook Quick Fix (For Renters)
Cost: Under $30
Look, not everyone can drill into their ceiling. I lived in apartments for years where my landlord would’ve killed me.
What worked for