DIY Wall Shelves for Small Props: Build Your Perfect Display in Under 2 Hours
Contents
- DIY Wall Shelves for Small Props: Build Your Perfect Display in Under 2 Hours
- Quick Project Overview
- What You Actually Need (No Hardware Store Treasure Hunt Required)
- The Basic Shopping List
- Make It Pretty (Optional But Worth It)
- How I Built My First Shelf (And How You Can Too)
- Step 1: Make That Wood Not Feel Like Splinters Waiting to Happen
- Step 2: Make Your Hardware Not Look Cheap
- Step 3: Attach the Brackets (This Is Where Math Happens)
- Step 4: The Wall Part (Don’t Panic)
- What Not to Do (Because I Already Made These Mistakes)
- Making Your Small Props Look Instagram-Worthy
- The Layering Game
DIY wall shelves for small props saved my sanity when my collection of tiny treasures started taking over every flat surface in my apartment.
I had Funko Pops on the windowsill, LEGO builds on the kitchen counter, and succulents crowding my desk.
My partner kept knocking things over, and I was one broken collectible away from a meltdown.
So I grabbed some wood, a drill, and spent one Saturday afternoon solving the problem for good.

Quick Project Overview
| Aspect | Details |
|---|---|
| Time Required | 1-2 hours total (including setup) |
| Cost Per Shelf | $20-50 depending on materials |
| DIY Skill Level | Beginner to intermediate |
| Best For | Small props, Lego sets, plants, picture frames, ornaments |
What You Actually Need (No Hardware Store Treasure Hunt Required)
Look, I’ve walked into hardware stores before and immediately felt like I needed a translator.
Not this time.
For DIY wall shelves for small props, here’s exactly what you need:
The Basic Shopping List
- 1″ x 6″ x 20″ wood board (or whatever length fits your wall—I grabbed reclaimed wood from my neighbor’s garage for free)
- 2 corner brackets (3″ size works perfectly—go bigger if you’re paranoid like me)
- 4 wood screws (1″ length does the job)
- 4 drywall anchors and screws (these little guys are lifesavers if you’re not hitting studs)
- A stud finder (magnetic ones are cheap and actually work)
Make It Pretty (Optional But Worth It)
- Wood stain or paint in your favorite color
- Spray paint for hardware (nothing says “I tried” like coordinated brackets)
- Sandpaper (120-grit is your friend)
I learned the hard way that skipping the finish makes your shelf look like you pulled it from a construction dumpster.
Don’t be past-me.

How I Built My First Shelf (And How You Can Too)
Step 1: Make That Wood Not Feel Like Splinters Waiting to Happen
Sand your board smooth.
I spent 10 minutes on this step while watching Netflix, running sandpaper along the edges and surface until it felt like butter.
Then apply your stain or paint.
I went with a dark walnut stain because it hides my mistakes beautifully.
Let it dry completely—I know you’re impatient, but trust me on this.
Step 2: Make Your Hardware Not Look Cheap
Here’s where you separate the amateurs from the pros.
Grab that spray paint and coat your brackets and screw heads.
I used matte black, and suddenly my $3 brackets looked like they cost $30.
Two light coats beat one heavy coat every single time.
Step 3: Attach the Brackets (This Is Where Math Happens)
Flip your shelf over.
Measure where your brackets should go—I placed mine about 2 inches from each end.
Mark the spots with a pencil.
Pre-drill tiny holes (this prevents splitting—learned that lesson the hard way).
Screw the brackets onto the underside of your shelf using those 1″ wood screws.
Pro tip: Make sure both brackets are the same distance from the edges unless you enjoy crooked shelves that haunt your dreams.
Step 4: The Wall Part (Don’t Panic)
This is where people get nervous.
I get it.
You’re about to put holes in your wall.
Here’s how to do it without calling your landlord in tears:
Find your studs first (if possible):
- Run your stud finder along the wall
- Mark where the studs are with painter’s tape
- If your shelf location lines up with a stud, you just won the lottery—drill straight into that bad boy
No studs? No problem:
- Hold your shelf assembly against the wall where you want it
- Use a level (this matters more than you think)
- Mark where the bracket holes hit the wall
- Install your drywall anchors at those marks (twist them in like screws)
- Screw the shelf assembly into the anchors
I mounted four shelves last month using only drywall anchors, and they’re holding strong with LEGO sets, plants, and my embarrassing collection of anime figures.

What Not to Do (Because I Already Made These Mistakes)
Don’t skip the level.
My first shelf was off by half an inch, and it drove me nuts every time I looked at it.
Don’t overtighten drywall anchors.
They’ll spin uselessly in a crater you just created.
Don’t hang these shelves using only hope and prayers.
Use the proper anchors for your wall type.
Don’t load these babies down with encyclopedias.
They’re for small props—the clue’s in the project name.
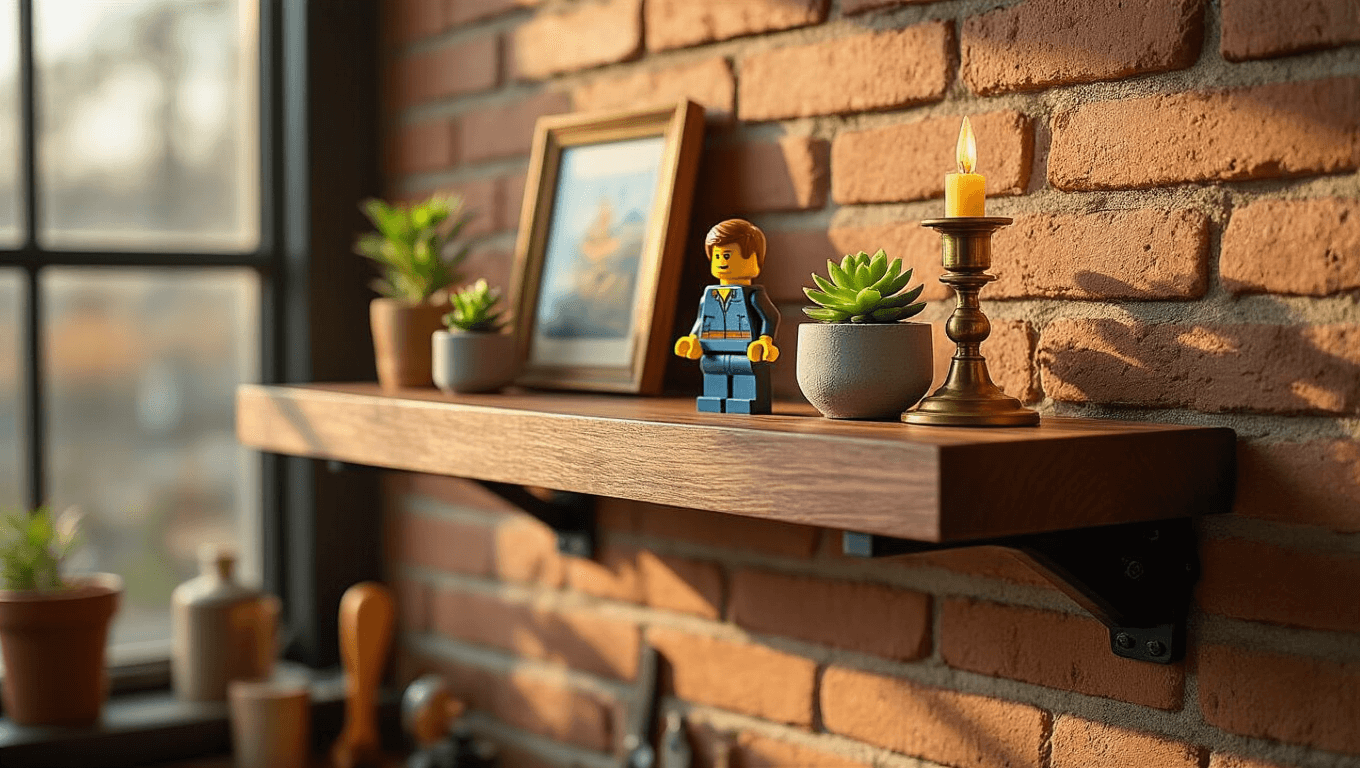
Making Your Small Props Look Instagram-Worthy
Building the shelf is half the battle.
Now you need to make it look intentional instead of like you just placed random stuff on wood.
The Layering Game
Mix these elements:
- Small potted plants (succulents are indestructible, which suits my black thumb)
- Picture frames leaning casually (not just hanging)
- Decorative boxes or small storage baskets for stuff you want hidden
- Candles or tiny lamps for that “I’m a real adult” vibe