How to Nail Your Hello Kitty Cosplay Makeup Like a Total Pro
Contents
- How to Nail Your Hello Kitty Cosplay Makeup Like a Total Pro
- Why Hello Kitty Makeup Is Trickier Than You Think
- What You Actually Need (No Fancy Stuff Required)
- Step One: Building That Perfect White Base
- Step Two: That Iconic Bow (Don’t Rush This Part)
- Step Three: Eyes and Facial Features That Actually Look Right
- Step Four: Outlining Everything (This Makes or Breaks the Look)
Hello Kitty cosplay makeup is one of those looks that seems super simple at first, but getting it to look exactly right takes a bit of practice and the right technique.
I’m gonna walk you through everything you need to create that adorable, iconic look that screams “kawaii cuteness” without looking like you just smeared some paint on your face and called it a day.
Trust me, I’ve seen plenty of attempts that miss the mark, and I want to help you avoid those mistakes.

Why Hello Kitty Makeup Is Trickier Than You Think
So here’s the thing.
Hello Kitty has this deceptively simple design—white face, black eyes, pink bow, yellow nose.
That’s it, right?
Wrong.
The challenge is making those basic elements look clean, balanced, and actually recognizable as Hello Kitty instead of just… random face paint.
I’ve tried this look myself a few times before I figured out what actually works, and let me tell you, symmetry is your biggest enemy and your best friend all at once.
Plus, you gotta think about how the design sits on your actual face shape, which is obviously way different from a flat cartoon character.

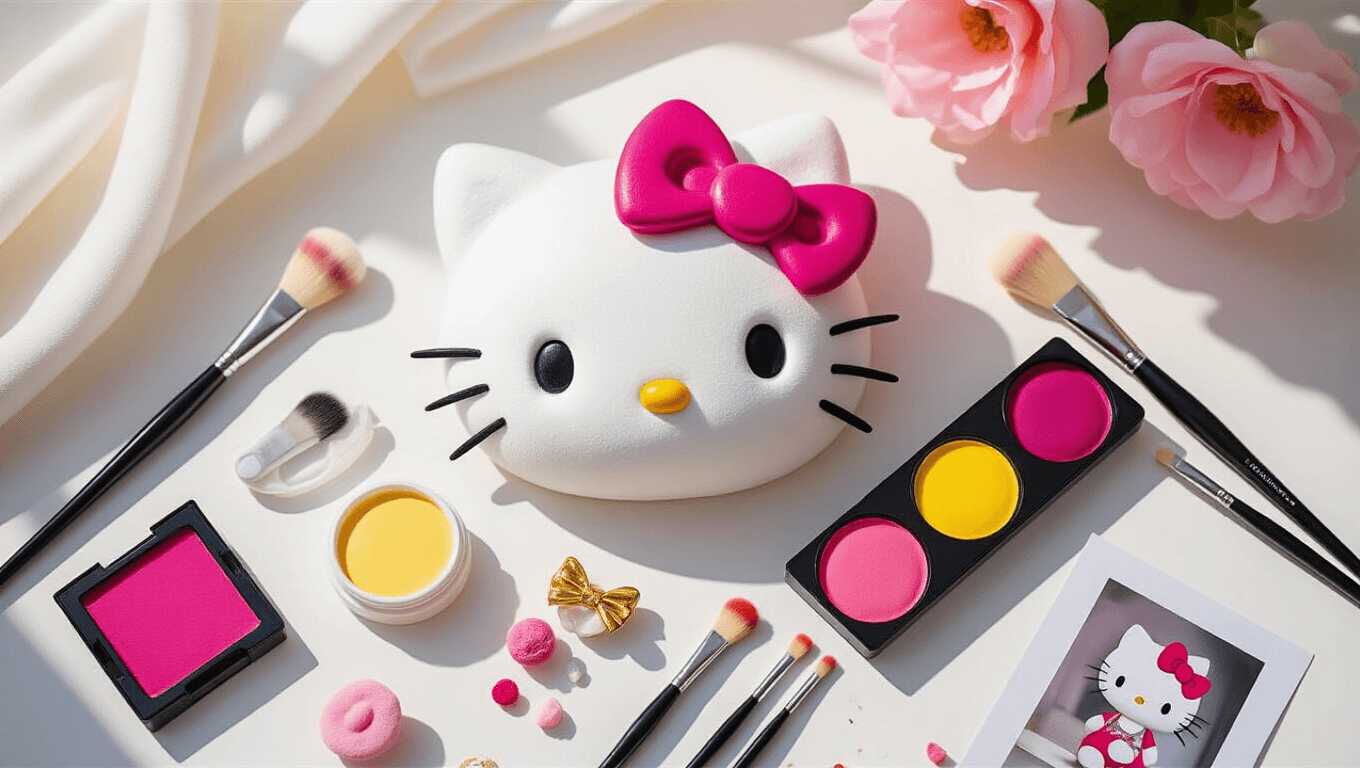
What You Actually Need (No Fancy Stuff Required)
Before we jump in, let’s talk supplies.
You don’t need a million products, but you do need the right ones.
The Essential Face Paints:
White face paint is your foundation here—I like Paradise White face paint or Superstar White because they give you that opaque coverage without looking chalky or weird.
Pink or magenta for the bow—Kraze Magenta works awesome, or Cameleon Bollywood Pink if you want something a little softer.
Black paint for outlining and the eyes—Diamond FX Black is super pigmented, or Cameleon Strong Black does the job too.
Yellow for that tiny nose detail—Fab Bright Yellow or Cameleon Banana Yellow both work great.
Brushes You Can’t Skip:
A good round brush set in different sizes is crucial—I’d grab sizes #1, #3, and #8 to start.
You’ll also need a 3/4 inch flat brush for base work.
And honestly, get yourself a decent makeup sponge because trying to apply base paint with a brush is just gonna frustrate you.
Optional But Helpful:
Stencils can save you time if you’re doing multiple looks or want perfect symmetry—Bam Stencil 1030 has some cute options.

Step One: Building That Perfect White Base
This is where most people mess up right from the start.
You can’t just slap white paint all over your face and expect it to look good.
Start by mapping out where Hello Kitty’s face shape is gonna sit on YOUR face.
I usually go for covering most of my face but leaving a small gap where my actual nose is, because Hello Kitty’s design has that little yellow nose dot.
Take your sponge and load it with white paint.
Press it onto your skin instead of dragging—this is super important because dragging creates streaks and uneven coverage.
Build up the color in thin layers rather than trying to get full opacity in one go.
It takes a little longer but the result is SO much cleaner.
Keep the edges soft for now because you’re gonna define them with black paint later.

Step Two: That Iconic Bow (Don’t Rush This Part)
The bow is literally THE most recognizable part of Hello Kitty.
If you mess this up, people might not even know what character you’re supposed to be.
No pressure though, right?
Load up your round brush with that pink or magenta paint.
Start with the center of the bow—draw a small circle or oval shape where you want the bow’s knot to be.
Usually this goes on the upper left or right side of your “face circle” (I prefer left but it’s your call).
Then add the two bow loops on either side.
These should be roughly triangular but with rounded edges, kinda like butterfly wings.
Make sure they’re relatively the same size—this is where that symmetry thing comes into play.
If one side is way bigger than the other, it’s gonna look wonky.
Take your time here and don’t be afraid to wipe it off and start over if it’s not working.

Step Three: Eyes and Facial Features That Actually Look Right
Here’s where Hello Kitty gets interesting.
She doesn’t have a mouth, which is actually part of her whole deal—the creator designed her that way so she could “speak from the heart” or whatever.
But you DO need those simple eyes and that little nose.
Using your smallest round brush and black paint, create two small oval dots for eyes.
They should sit pretty much where your own eyes are, but simplified and cartoonish.
Don’t make them too big or too detailed—Hello Kitty’s eyes are super basic.
Now grab your yellow paint and add a tiny dot where the tip of your nose is.
This represents her little yellow nose and it’s such a small detail but it makes a huge difference in making the look recognizable.
Step Four: Outlining Everything (This Makes or Breaks the Look)
Okay, this is the step that separates amateur attempts from actually good cosplay makeup.
Load up a round brush with black paint—I use a #3 for this usually.
Carefully trace around the entire white face shape you created earlier.
This outline needs to be clean and consistent in thickness.
Go slow.
Like, really slow.
If your hand shakes or you mess up, you can fix it, but it’s easier to just take your time in the first place.
Also outline the bow to give it definition and make it pop against the rest of the design.
This black outline is what gives the whole look that cartoon quality and makes it look intentional instead of like you just painted your face white for fun.

[…] ensuring fidelity to the character while adding their own flair. Guides such as those found on cosplay idea platforms provide detailed advice for achieving professional […]