JoJo cosplay makeup is all about mastering cell shading techniques that bring those iconic anime faces to life.
And let me tell you, the first time I tried it?
Total disaster.
I looked like someone attacked my face with a Sharpie after a few too many energy drinks.
But here’s the thing—once you understand the basics of cell shading and how to work with your face shape instead of against it, JoJo makeup becomes way less scary.
I’m gonna walk you through everything I wish someone had told me before I wasted three hours and half my makeup stash on my first attempt.

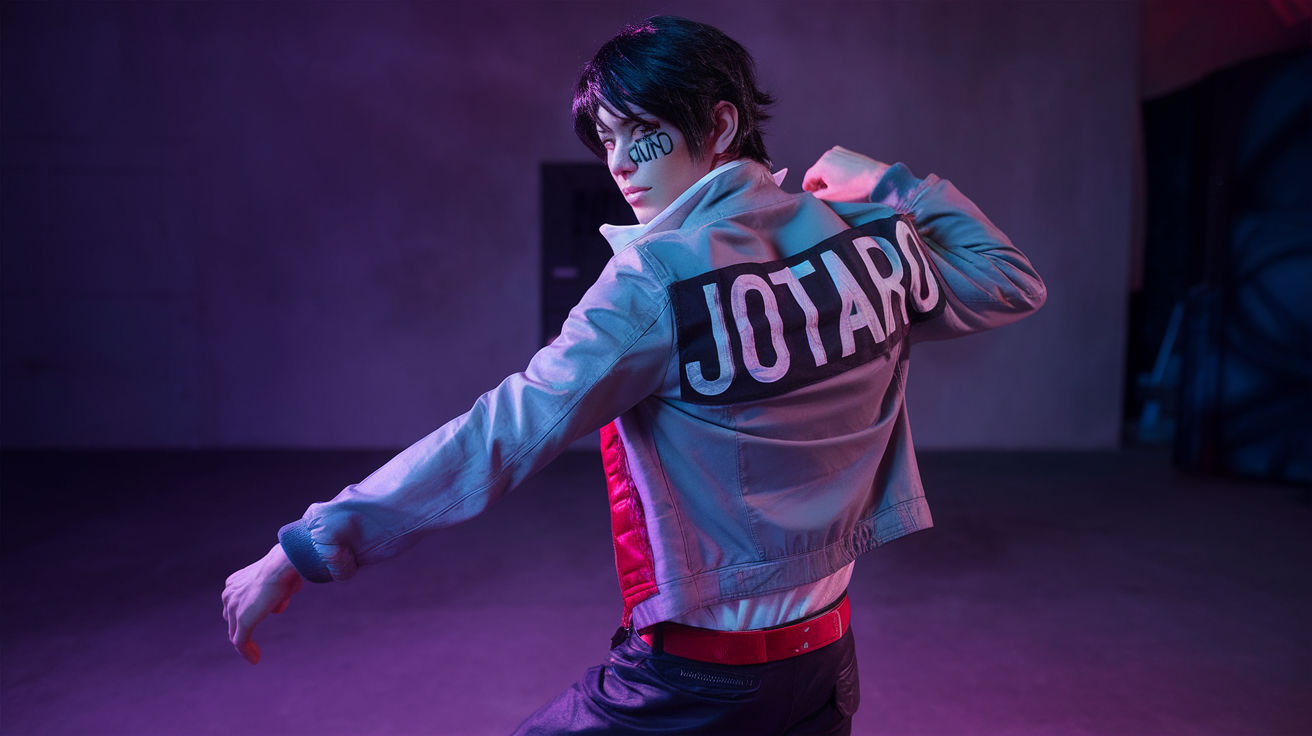
What Makes JoJo Cosplay Makeup Different
Contents
Most anime makeup tries to look soft and pretty.
JoJo makeup says “nah” to that whole vibe.
It’s bold, it’s dramatic, and it uses thick black lines to create shadows and definition that look straight out of the manga panels.
The technique is called cell shading, and it’s basically drawing your contour instead of blending it.
Sounds weird, I know.
But when you see it come together, it’s honestly so cool.
The lines aren’t supposed to look natural—they’re supposed to look like art.
Like your face is a living, breathing illustration.

Understanding Cell Shading For Beginners
Cell shading is the backbone of JoJo makeup.
Instead of using powder contour that blends into your skin, you’re using liquid eyeliner to draw clean, precise lines that mimic shadows.
These lines define your facial structure and add that cartoon-like appearance.
Think of it like this: when an artist draws a face, they use lines to show where light hits and where shadows fall.
You’re doing the same thing, but on your actual face.
The key is control.
Your lines need to be steady and intentional, not shaky or rushed.
I recommend practicing on your hand first or even on paper to get the motion down.
Basic Cell Shading Tips:
- Use a felt-tip liquid liner in matte black for the cleanest lines
- Start light and build up—you can always add more
- Keep a cotton swab and micellar water nearby for quick fixes
- Work in sections so you don’t smudge what you’ve already done
- Take breaks so your hand doesn’t cramp up
The learning curve is real, but once you get the hang of it, you’ll feel like an actual makeup artist.

Feminine vs Masculine JoJo Character Approaches
Not all JoJo characters need the same makeup approach.
The feminine characters have softer features with more rounded lines, while masculine characters get those sharp, angular lines that scream intensity.
For feminine looks, you’re working with delicate placement.
Your cell shading lines should be thinner and placed more strategically—like about a quarter of the way through your eyebrows instead of halfway.
The goal is to enhance your features without overpowering your natural face shape.
Masculine looks, on the other hand, go hard.
Thicker lines, stronger angles, heavier shading around the jaw and cheekbones.
You’re literally reshaping your face with liner to create that chiseled, intense JoJo protagonist energy.
I’ve done both styles, and honestly?
Masculine looks are more forgiving because the lines are supposed to be bold.
Feminine looks require more precision and a lighter touch.
Figure out which character type you’re going for before you start, because it’ll change your whole strategy.

Prepping Your Face The Right Way
Before you even think about picking up that eyeliner, your base needs to be solid.
Trust me on this.
I learned the hard way that cell shading over a patchy foundation looks absolutely terrible.
Start with a good primer that’ll keep everything in place.
JoJo makeup takes time, and you don’t want it sliding off halfway through the con.
Then apply your liquid foundation evenly.
I like using Revlon Colorstay because it’s affordable and actually stays put, but use whatever works for your skin.
The goal is a smooth, even canvas.
Foundation Steps:
- Apply primer and let it set for a minute
- Use a damp beauty sponge to blend foundation
- Build coverage in thin layers instead of one thick coat
- Set with a light dusting of translucent powder
- Don’t forget your neck—nobody wants a floating head effect
If you’re doing a feminine character, add some cream contour to soften your jawline before setting everything.
For masculine characters, you might actually want to sharpen your jaw with contour before you add the cell shading lines.
It gives you a better base to work with.

Creating The Perfect Eye Makeup Base
Your eye makeup needs to be on point before you add any cell shading.
This is where a lot of people mess up—they try to do the lines first and then the eyeshadow.
Wrong order.
Start with a neutral smoky eye as your base.
I usually go with taupe and warm browns because they work with most skin tones and don’t compete with the black liner you’ll add later.
Blend a light neutral shade across your entire lid.
Then take a medium brown into your crease and blend it upward.
Add a darker orange-brown to the outer corner for depth.
The key word here is blend.
You want smooth transitions, not harsh lines—those come later with the cell shading.
Eye Makeup Layering:
- Light neutral base color on the entire lid
- Medium taupe or brown in the crease
- Darker warm brown on outer corner
- Neutral cream color on the center of the lid for dimension